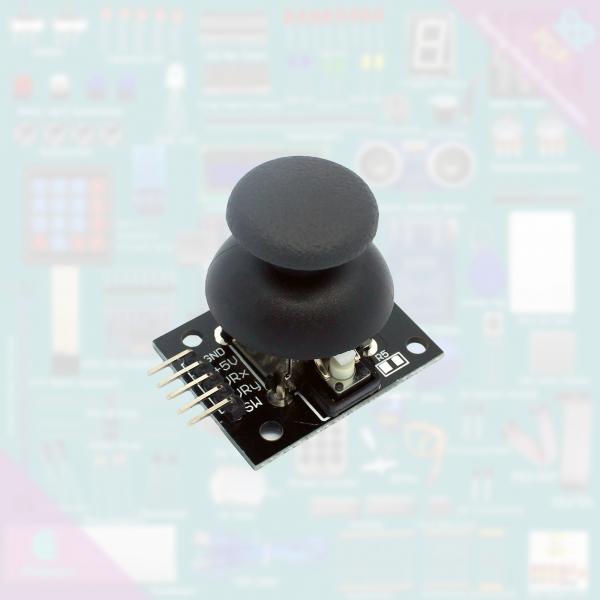
What are the PS2 Joystick Module Features? How Does It Work?

It is a joystick module that closely resembles the 'analog' joysticks on PS2 controllers.
PS2 Joystick Module It contains a spring-assisted joystick that is self-centering (which means that it automatically centers itself when you let go of the joystick), and a comfortable button or cover that gives you a feeling of ease of use. One of these springs is called X and the other Y.
The purpose of the X, Y joystick module is to transmit 2-axis motion to the Arduino. This is achieved by having two independent 10Ks, one on each axis.
These potentiometers (the two blue boxes on the side of the joystick) are used as dual adjustable voltage dividers that provide two-axis analog input in the form of a control stick.
The joystick contains a switch that is activated when you push down on the cover.
The switch is the little black box on the back of the joystick.
If you push the cover down, you will see a lever pushing the head of the switch downwards. The lever works no matter what position the joystick is in.
You will also see it when you examine the product image in detail. Below we will detail the pins and try to transfer them in items.
XY Joystick Module Pin Outputs and Names
GND: It is the ground pin.
VCC: It provides power to the module. You can connect it to the 5V output on your Arduino.
VRx: Allows the joystick to be read horizontally.
VRy: Allows the joystick to be read vertically.
SW: Output from the push button. Normally on, when the button is pressed it gives LOW output connecting to GND.
If you want to use it on a robot, you can easily connect the module to two analog inputs to control your robot from X and Y axes.
PS2 Joystick Module General Features
- Arduino and Raspberry Pi compatible
- X and Y axis control
- One digital output medium button
- Excellent sensitivity
- Power LED
Let's Look at How the PS2 Joystick Module Works
The basic working principle of a joystick, The position of the joystick works by translating electronic information from the X axis (right to left) to the Y axis (up and down), which an Arduino can process.
Let's put it this way for easier understanding, imagine a spring-loaded mechanism under the joystick that sends the necessary code to the Arduino to move left and right, up and down, and then it works, so you can start using it for whatever purpose.
Since the Arduino board has a 10-bit ADC resolution, the values on each analog channel can range from o to 1023.
PS2 Joystick Module Technical Specifications
- Outputs:
- GND: Ground
- +5 V: DC 5 V Input
- VRx: Analog Data 1st Axis
- Vry: Analog Data 2nd Axis
- SW: Button Control
We tried to explain the PS2 Joystick Module in detail. As we said above, whether you want to play games or control devices such as robots etc. Since the joystick is very easy to use, you can install it without any problems and start using it immediately.
Aynı Kategoriden
- Which Paint Measuring Device to Buy? - Linshang LS220 Auto Body Paint Measuring Device
- What to Consider When Buying an Automotive Body Paint Thickness Gauge? Here Are the Details
- Renault SGW Gateway Unlock: A New Revolution in Vehicle Maintenance
- Differences Between Saildiag Diagnostic Device and Dimsport New Trasdata ECU/TCU Programming Tool
- Differences Between KT200 II and AlienTech KESS v3 Ecu Programming Tools


 All Categories
Yorumlar
Yorum Yazın